Visit My Website, A Personal Gallery!


Click on Logo Bar Below, to visit my website!


Wednesday, October 20, 2010

Securing Beaded Panels

Since my last updated post about this cell phone bag, I have completed finishing off the warps, which I complete while still on the loom. Now I can begin the assembly of each panel and the strap.

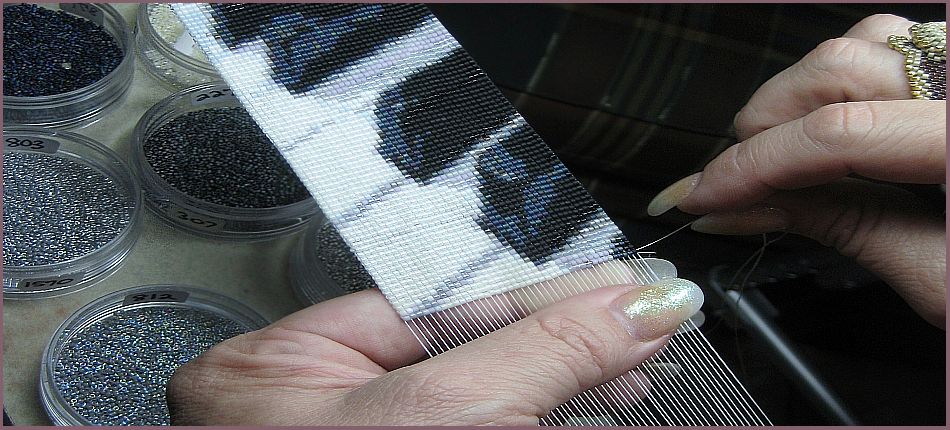
My first step is to connect the two panels. I am using 11/0 jet black 'cut' seed beads, for shine. I'll layer them in groups of (3) beads between the panel, allowing the 'bend' for the bag. The looming is not forgiving when it needs to lay in a circular shape, unless I loomed this from the other direction (beads loomed top to bottom). For ease of looming, I like looming 'side-to-side'. So the connection between the two panels have to be more bendable. With each pass, in between the loomed beads, I am adding one 11/0 Permanent Silver Metallic Glass Bead. This gives more support for 'pull' if the sides are stressed, as opposed to me running the thread directly in-and-out of the looming, only.

The underside is just as flexible. I don't include the additional bead on this side, but I do make sure my needle passes in the outer edge of each bead, not below the looming threads. If you look close, you can see the looming threads but on the top, you can only see the bead edges.

I have also been planning the strap, for the bag. These are the beads I have selected, which are colors from 'both' sides of the bag. The large round black beads, at the top, were a great find. They are 'matte' finish with a 'glossy' dot, again, picking up the finish from the black used on both panels! I'll also be creating a beaded spiral section, to go behind the neck, using matte cut beads and weaving a few bead tubes to include in the strap.

I am still thinking about the fringes, what-how-beads-length, which is something we all do 'while still beading'....planning (dreaming) ahead!
Monday, October 18, 2010

Adding a Bead is best done 'Sticky'!


I am finishing up the last few rows of this panel, for the cell phone bag. (I got a bit 'side tracked' with another beading projects and some book writing!) There have been times, through out my looming, where I missed a count or left a bead color off a row, having to pull all the beads off and recount or find the place I dropped. There are many ways of correcting this mishap, but I found one way to be the easiest.

Enlarge the row of beads, in the picture below. Notice how many different colors are added to the needle, row for row. At any given time, a bead color can be over looked or a count of any bead can be missed. Instead of pulling the entire row off the needle, I like to use my 'sticky method' of replacing that 'missed bead'.


Using a white 'paper tape', I tape down a strip, sticky side up. This is something I keep by my side, while I loom, often. The paper tape does not leave any 'glue residue' and is 'just as adherent as any other tape.


After noticing there is a bead missing, while punching the beads upwards, between the warps, I recount to find the bead I must be missing. My first thought is how I hope it is one of the last beads put on the needle. Of course, it can't always be that easy! When I find the 'needed bead', I'll stick the row of 'keeper beads' on to the sticky side-up, of the paper tape. Then I pull out the thread and needle, exiting the entire row. The tape will keep the row in order, so I can re-thread the same beads, without having to follow the pattern again!


After I add the 'needed bead', then I run the needle back into the row, stuck on the tape. I can then continue to loom!


Another note, on using 'paper tape', opposed to any other. It is stiffer then most. Therefore, you can even lightly 'bend' the tape, sticky side inward, to hold the row of beads, if you feel the seed beads you are using won't stay well on a flat surface.

I wrote an earlier post, on how I remove an 'extra' bead, from my needle and thread. Again, I use a pair of pliers or small wire cutters, to catch 'just the edge of the bead I want to remove' and 'crack it' away-from-the-thread. Cracking any glass bead, directly over the thread it is threaded, will cut the thread.

Tuesday, October 12, 2010

Wave Good-Bye to 'First Row Ripples'!

This present bead weaving is considered a 'wider weave', 67 beads wide, opposed to many pieces woven by beaders. Cuffs can get wide, maybe even 40 beads wide (2 1/2"), but not as wide as this cell phone bag panel. This is a good time to reiterate how to deal with a 'long wavy first row'.

I receive numerous emails, asking me this very question, "Is it OK that my first row is not laying straight?". To answer this question, I will share some of my first few rows, on this cell phone bag panel. It may have been discussed before, here on my Blog or in my Website, but I feel it is worth discussing again.

Below is a picture of my first row, 67 beads wide, secured on the warps, as any other loomed row of beads. Notice how wavy this looks. This is exactly why some loom companies offer a loom they feel is created for 'various types of beads', (Czech, Delica, etc., but all 11/0). It's the spacing of the 'weft separator' that we are told makes all the difference. I strongly disagree, with this assumption. I use the same loom, some width separators, for most of my weaving, (The only time I change up looms is to acquire a larger 'loom table', for larger pieces, sized larger then the loom.). If you start in the center of your loom, center of your pattern, any loom will work. The other option is to just ignore the wavy reaction, as I do here.

If you prefer to start out with a 'straight row' of bead weaving, or feel you just are not sure it will work out as planned, then cut a length of 24 gauge craft wire. Thread this through the entire first row of beads. You can see in the picture below, it will straighten out the beads perfectly. Since you are not running your needle back through that row, then it can sit till you feel comfortable enough to pull it out, or if you need to remove it for your finishing techniques.

I feel comfortable keeping the row of beading as it is, without the wire support, especially for long rows. My hand is not wide enough to reach across the row, without rippling the beads, to run the needle through the rows that follow. Therefore, I can almost, 'grab my long row of beads' in my hand and release the row as my needle is threaded into the next row.

Below is a picture of how the rows will 'shake out' straight, if you don't thread the row with wire. You can still notice a wave, but it is getting much better.


Now that I have completed 28 rows, of the pattern I created, the 'wavy first row' is no longer an issue! It gets even better, after the piece is cut from the loom!

The best advice is to make yourself feel comfortable about what you are weaving. Use the wire technique if you feel you need to see a more uniform look, or just let it work itself out, as the rows increase. Weaving beads on a loom takes a lot of 'special time' and the last thing anyone wants is to feel they have to cut the warps and start over!

Monday, October 11, 2010

Pushing '2D Bead Loom Weaving' into '3D'


I have completed the one side, or panel, of this cell phone bag. Included in the picture of my weave, still on the loom, is a picture of my inspiration. This photo was taken by an amateur photographer named Jean Upton. She shares her photographs on Face Book and it was there I found all of her pictures to be gorgeous! She gave me permission to use one in a looming!

Posting this picture, gave me a idea to share some of my thoughts on 'subjects' selected for 'bead loom creations'.

Bead Loom Weaving is unlike many other methods of bead weaving. Since the canvas stays at a two dimensional flat surface, a pattern can make the difference. Oh, of course you can add to the flat loom woven surface, by embellishing and attaching a focal, but for the most part, it is a surface that stays flat. When you see a weaving that bowls you over, it usually is because the pattern and color selection over whelmed you, as opposed to a wonderful hand woven piece that is constructed to defy all beading strategies, standing 'up & out'. Not much use for a well thought out pattern or struggle over the 'right color' bead needed to draw out a subject, as it is in loom weaving the seed beads.

Patterns can be considered in many ways. Maybe a graphic is needed to offer a modern feel, or cultural idea, or out of a need for a pattern in general. I prefer to consider a subject, one that is understood and seen right away. It is through my desire to create photographs in beads, that I have acquired my best 'bead color lesson'.

Programs, which are the norm of use, for many beaders, have their faults. One of the biggest is the program's desire to constantly offer the wrong color for the same color seen differently by the eye! There is no such thing as 'instant perfect pattern', with any bead pattern program! I am versed in them all! Whether they are offered for sale or free on the web. I am also comfortable in using a method I created, before 'bead pattern program creation', using a graph acetate over a photograph. All of these methods, of creating patterns, need to be 'tweaked'. Its' the tweaking that teaches you more.

I am including a chapter, in the book I am finalizing, about bead programs and suggestions for 'tweaking' them. But if you want to get the best education on bead programs, use them! Loom some patterns and see how they play out. Make the changes in your program to not fall into the same 'mishap' again (wrong bead color selection, etc.). Try out creating a 'specific pallet' of some colors you see in the photograph and use the program to create the pattern with only those selected colors! Change up the bead width and length, even if it hinders your pattern width/height. One slight change of the bead number, makes a huge difference in a pattern! (Remember, it's the pixels of the picture the program is reading!)

Above all, apply yourself to use the programs and don't feel defeated if the bead looming does not relate to your mind's eye, as well as you hoped. You did learn something, and now own a gorgeous piece of loom weaving that only 'you' know has unfavored color choices!

Friday, October 8, 2010

Detailed Patterns Take More Time!


There are only 44 colors used, in this picture, but the number of each color required per row, are small. What I am saying is that each row must have approximately 34 of the 44 total colors used, on each needle pass. This is a slower process, because I am picking up only one bead color at a time, till the entire row is complete, jumping between the multiple bead color cups. I love the meditative feeling this offers, so the slower completion time won't bother me. But take such a pattern into consideration, if you feel that you want to see the finished piece sooner, to start on the next! Look over patterns to notice the rows and colors needed to complete. Of course, you can't deny the wonderful detail, but again, you may want a pattern that moves along faster instead.

Wednesday, October 6, 2010

Attaching A New Weft

It is faster and easier to use the length of weft, which is the most comfortable for you to use, during any particular size looming. The more 'beads wide', the more times you will need to attach a new weft thread, because the rows are longer and use up the thread faster. I prefer to swap out my weft thread in a way that I do not have so many 'tails' of weft thread hanging around my looming. Let me share with you how I swap out my weft thread.


After tying off and cutting the short weft thread, just completing some final rows, I thread my needle on to the tail of the new thread spool, 'just thread the needle directly to the new thread spool'. Run this threaded needed into the first bead on the last row, or the same bead you exited when you finished up the row prior, still with the spool attached to the other end.


Follow through the entire last row of beads, exiting out the outside right bead, still leaving the spool attached to the new running thread, and entering the first bead in this row. Tie a double hitch knot on the outside warp, in between the two end beads of the last two rows.


After tying a tight knot, run the needle and small tail of weft thread, into the 'last bead of the second-to-the-last' row of beads. This will also pull the knot 'center' of the last two rows.


If your looming is wide, then exit the needle halfway through the row. If the looming is more narrow, then run the needle completely across the row, existing out the fist bead on the second row up, (the same row you just entered). Pull taught, then cut the new weft thread, close to the bead it was exiting.

Now you can move back to the 'spool of new weft thread'. Pull out as much thread as you feel comfortable using on your needle. Some like to use a thread just long enough for one complete arm length and others like to include extra so the new weft thread lasts longer (I prefer the extra weft thread, myself!). Cut the new length of weft thread from the spool, thread your needle and begin looming again. There are no tails to get in your way and no tails to clean up later. Also, the knot is situated in between rows, which will allow me to insert the needle, comfortably, later when I am edging or completing my finishing method.

Tuesday, October 5, 2010

A Vibrant Color Cell Phone Bag!


Ever since I completed my first loomed Cell Phone Bag, for RR, I was excited to start another! This is the beginning of the first panel/side. I won't share the subject of this picture, so I can let you see it unfold!

I don't think I have ever worked with such vibrant colors before. Looking through my portfolio, I notice muted tones, but this will kick my reputation up a notch!

The other side should be related to the first panel's picture, which the subject seems to be eluding me at this time. As it unfolds, noticing the subject of this panel, please offer your opinions or suggestions on the subject for the opposite side of this Loomed Cell Phone Bag!

I'll be photographing the stages in detail, since the first time I used my methods, of finishing warps, worked out perfectly, on the first bag. This time, I'll be sure to keep a log as to how it was finished off!