Visit My Website, A Personal Gallery!


Click on Logo Bar Below, to visit my website!


Monday, January 31, 2011

Working with Two Loomed Strips

Once this idea, of creating two loomings, kicked into gear, my imagination started to work in directions never thought of, before. I initially began to create a 'reversible' cuff, pulling out my 'swivel lobster claw clasps'. (This would allow the looming to spin, for which ever side you want to wear outward.) Once I moved further on to the clasp idea, I decided I would leave the 'swivel' idea, for another time. Now I have secured the two loomed photos, side by side, "Siamese Style".

Why not just loom them both together, in one wide strip? Because I would not have been able to create the beaded edge, for my better idea. There is much more to be attached, so this type of edging, "Siamese Style" will work perfectly.


The two 'copper crunchy clasps', will also play a role in what I have in mind. These also made the cuff adjustable, for any wrist size.

Sunday, January 30, 2011

An Accent Idea for Stan and Laurel

I picked out some cute photographs and worked on a photo management program to create something that would match the cuff I am looming. You can see the painted areas I added, then change up the background a bit and sized each to fit the glass cabs. The black and white was also changed to a sepia, matching the color of the beads, in this cuff.


I'll be putting together the pictures and the cabs, so I can bead bezel around each of them. They will both go on the cuff, but the idea I have in mind seems a bit unrealistic right now, so I will show you when I decide where these will be attached.

Saturday, January 29, 2011

A "Stan and Oliver" Cuff!


I am working on two looms, at once, for my latest looming idea! Just the fact I am using 'two' looms, also brought to mind the perfect subject matter, "Stan Laurel & Oliver Hardy".

You can see the first steps are complete. I'll be sharing some ideas I have in mind, to make this a totally new design, for me! This may be one of those creations that force me to grow in other directions!

Thursday, January 27, 2011

Loomed Needle Case!

Now all of the stages, I have been sharing, are complete!


I like to use a wine cork, to secure my scissors from damage. To make this a complete set, I am thinking about beading around the cork! If I do, I'll be sure to share the set.

Tuesday, January 25, 2011

Zipping Up the Needle Case

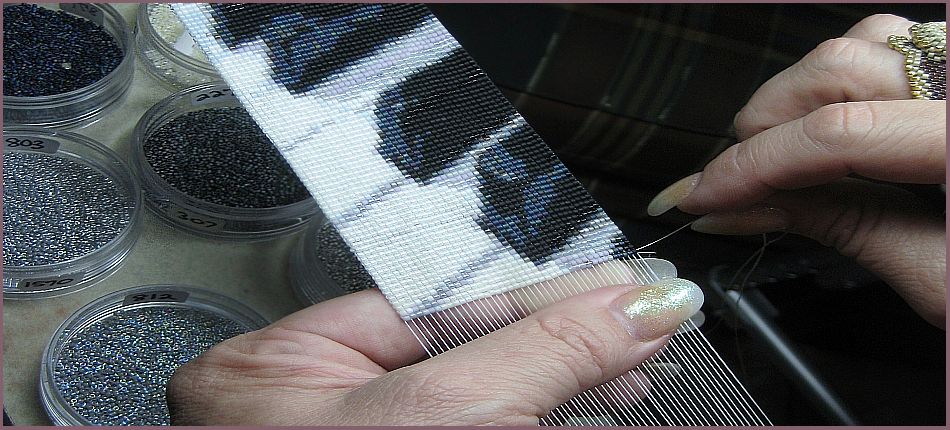
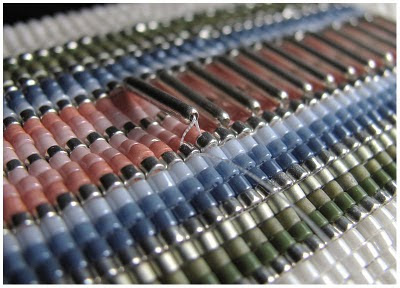
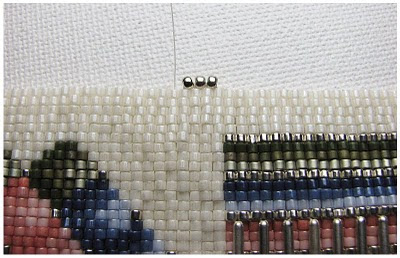
Continuing on, from my last post, sharing how I was adding the accent 'liquid silver' bugle beads to the outside panel, I'll show how I secure my accent beads. In the photo below, I centered the bugle bead, between two rows of looming. This way, the bugle bead is very secure and won't 'roll' as it would if I only used one thread and one attach point, to secure. Always think in terms of your bead looming being well used, even under normal handling. Work out ways, in your designs, to secure the accents with more then one thread.


Once the decorations were complete, which is my favorite part..., I cut the beading from the loom, completed my finishing techniques for managing the warps, attached two snaps for a closure and will now begin the 'zip' process.


I want to create a wider case, not so much an 'envelope', to hold my needles. Therefore, I planned, during the looming process, to allow four rows of looming for the base of my case. At this stage, I edge with three beads, 11/0 Toho Permanent Silver Metallic, across the base I want to create. I planned four rows across the base, so this means I can add three edging beads.


Now I can begin the zipping of the sides. I can't use the same 11/0 beads for this because of the size difference with the Delicas I used to loom the case. If I use the Toho beads on the sides, as I did on the edging of the base, they would buckle. The shape and size difference in the Toho and Delicas I used would create this buckling. Therefore, I am using Delicas, in a Metallic Silver. The four loomed rows for the base and the three edge beads on the bottom will equate to using 'five Delica beads' for zipping up the sides.


As I continue up the side, from the base, I will also add a 'stop bead' for each turn of the needle, moving up the next row of loomed beads. I like to use a stop bead because I think it gives the thread a more secure way of holding the sides together. It also hides the turned thread, between the loomed rows.


I'll be wrapping this up and show the finished photos next!

Sunday, January 23, 2011

Adding accent to the needle case


I have completed the total looming length, for this needle case. It includes the front/side/base, of how I want the finished case to measure. I am planning on it holding a number of 'needle packages', sized from English Beading Needles to the long length of a 'Looming Needle'. I use these often, but also use the smaller for some detail beading added to my loomings.

I'll be adding some accent with these 'liquid silver' bugle beads...resembling a needle!

Tuesday, January 18, 2011

Loom weaving both side of the Needle Case


I am not making two sides, for this case, but weaving the length to create both sides. This is just another way to handle the base of any enclosed loom woven case, purse, or bag.

There are four rows set aside to handle the base or fold over. The sides will also be zipped with the proper number of beads to match the base/fold over.

Wednesday, January 12, 2011

Working on a Needle Case!


I seem to loom more then I share here, so I thought I would show what I am looming now. I'm designing a needle case.

My first thought was to loom the width of a needle length. Then I decided to turn this around and loom the width of the case by the length of the looming needles, a base width, then the other side of the same case. Or, looming the front and back at one time. This will be folded over and the sides zipped up, similar to how I finish a cell phone bag. Four loomed rows will become the bottom of the case, giving it some space for many packages of needles.

The closure will be a metal "snap". I prefer to use snap closures for these type of things as opposed to incorporating them into my loomed jewelry.

Thursday, January 6, 2011

Loom Woven Earrings


I just bought the cutest little loom, perfect for making earrings. This is an idea I have been working on for many years, but only feel I am finally perfecting the perfect method.

Quickly, I am sharing one earring, of one particle pair. I named these, "Navajo Blankets". They are loom woven with sterling findings and hand woven triangle drops. I have many more to show, but I still want to work out some of my ideas before I share them too!